The holiday season ushers in a symphony of delightful aromas and tastes, and among the most cherished are those that blend the richness of chocolate with the refreshing zest of peppermint. Few treats capture this festive spirit quite like chocolate peppermint blossoms. These iconic cookies, with their fudgy base, crinkly sugar coating, and signature melted chocolate kiss, are more than just a dessert; they are a tradition, a taste of nostalgia, and a perfect embodiment of holiday joy. Whether you're a seasoned baker or new to the kitchen, mastering the art of these festive cookies is a rewarding endeavor. This comprehensive guide will walk you through every step, from selecting the finest ingredients to creative presentation tips, ensuring your chocolate peppermint blossoms are the star of any holiday spread.
The Irresistible Charm of Chocolate Peppermint Blossoms
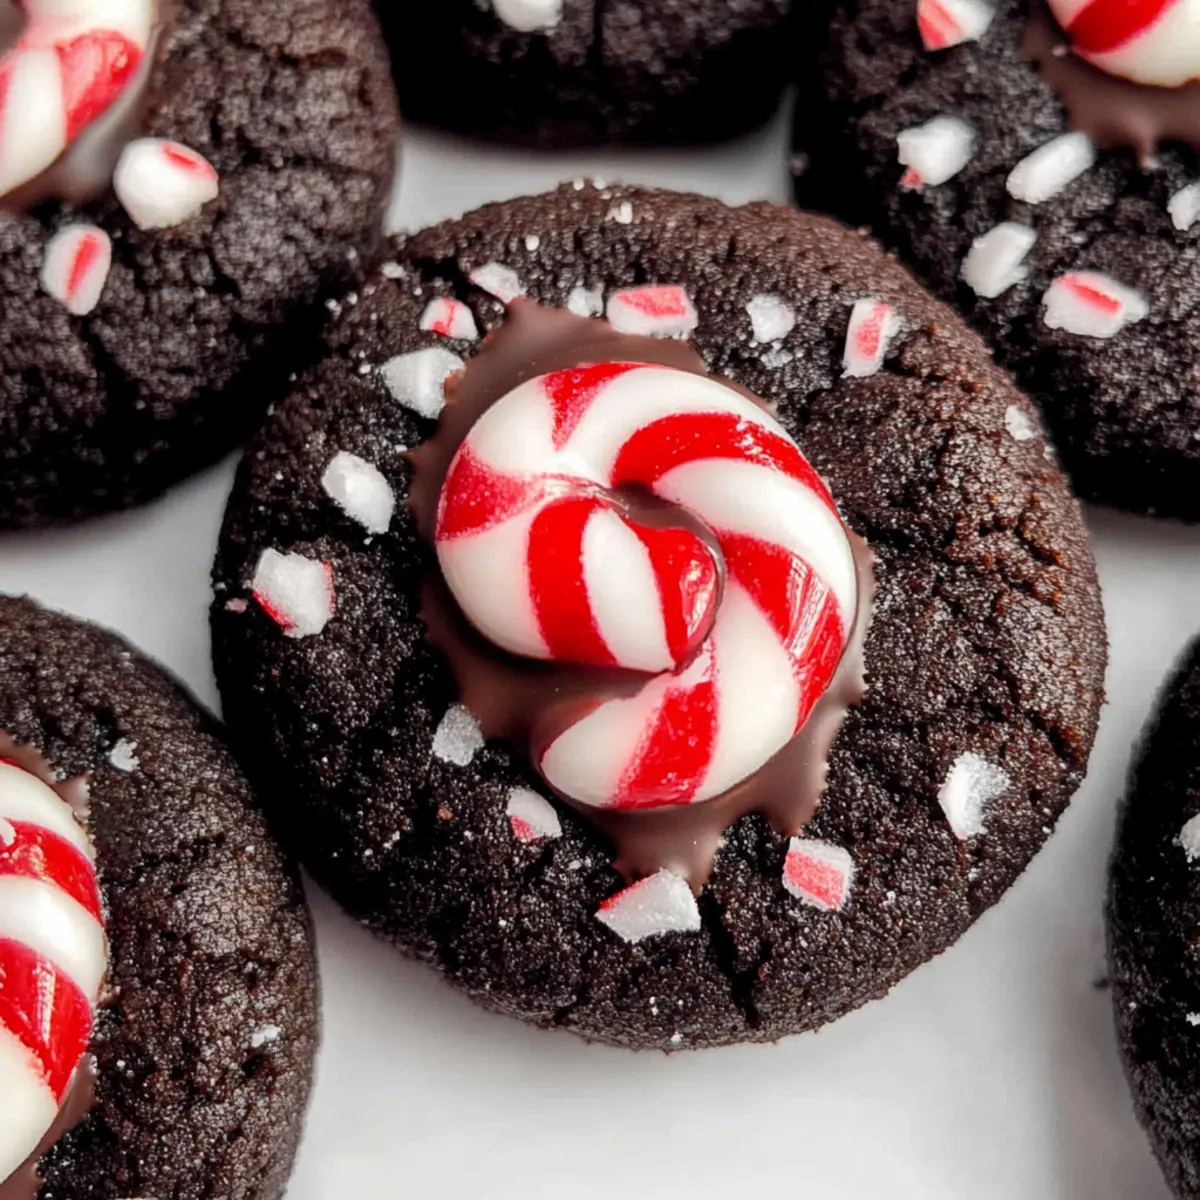
There's something uniquely captivating about chocolate peppermint blossoms. Perhaps it's the striking visual contrast of dark chocolate against a snowy peppermint-sugar coating, or the delightful surprise of a soft, minty chocolate kiss nestled in the center. Originating from the classic peanut butter blossom recipe, this festive twist elevates the cookie to new heights of holiday appeal. They're a staple on cookie platters, perfect for gifting, and an absolute crowd-pleaser for all ages.
The beauty of these cookies lies in their balanced flavor profile. The deep, slightly bitter notes of chocolate are beautifully complemented by the cooling, invigorating sensation of peppermint. This combination is not only delicious but also evokes the crisp, celebratory atmosphere of winter holidays. For those looking to dive deeper into the nuances of crafting these delightful treats, our guide on Bake Perfect Chocolate Peppermint Blossom Cookies offers even more detailed insights into achieving baking perfection.
Mastering the Dough: The Heart of Delicious Chocolate Peppermint Blossoms
The foundation of an exceptional chocolate peppermint blossom lies in its dough. A well-prepared dough ensures a soft, chewy cookie that holds its shape and perfectly cradles the chocolate kiss. Getting this right is crucial for success.
Essential Ingredients for Stellar Chocolate Peppermint Blossoms
- All-Purpose Flour: The structure of your cookie. Measure it correctly – too much can lead to dry, crumbly cookies.
- Unsweetened Cocoa Powder: Opt for high-quality Dutch-processed cocoa for a richer, darker chocolate flavor and color.
- Baking Soda: A leavening agent that helps the cookies rise and spread slightly, contributing to their soft texture.
- Salt: Essential for balancing the sweetness and enhancing the chocolate flavor.
- Unsalted Butter: Softened to room temperature for easier creaming. Butter adds richness and tenderness.
- Granulated Sugar & Brown Sugar: A combination provides the perfect balance of crispness and chewiness. Brown sugar adds moisture and a slight molasses note.
- Eggs: Act as binders and add moisture, richness, and structure.
- Peppermint Extract: The star of the show! Use pure peppermint extract for the best flavor. Start with a small amount and adjust to your preference, as it can be potent.
- Hershey's Kisses (Peppermint or Regular Milk Chocolate): The iconic topping. Peppermint-flavored Kisses enhance the mint profile, but classic milk chocolate works wonderfully too.
- Crushed Candy Canes (Optional): For rolling or sprinkling, adding extra peppermint flavor and a festive crunch.
The Art of Mixing and Chilling
Precision in mixing is key. Begin by creaming the softened butter with both sugars until light and fluffy. This incorporates air, leading to a tender cookie. Beat in the eggs one at a time, followed by the peppermint extract. In a separate bowl, whisk together your dry ingredients (flour, cocoa powder, baking soda, salt). Gradually add the dry ingredients to the wet mixture, mixing just until combined. Overmixing will develop the gluten in the flour, resulting in tough cookies. Stop as soon as no dry streaks remain.
Chilling the dough is a non-negotiable step for perfect chocolate peppermint blossoms. Wrap the dough tightly in plastic wrap and refrigerate for at least 30 minutes, or up to 2 hours. Chilling allows the flavors to meld, the butter to firm up, and prevents the cookies from spreading too much during baking, ensuring they hold their distinct blossom shape. This also makes the dough easier to handle and roll.
Baking to Perfection: Achieving that Signature Blossom Look
Once your dough is perfectly chilled, the baking process transforms it into those delightful, holiday-ready treats. This stage requires attention to detail to ensure optimal texture and the perfect "blossom" effect.
Rolling and Coating: A Touch of Sparkle
Preheat your oven and line baking sheets with parchment paper. Prepare two shallow dishes: one with granulated sugar, and another with a mixture of granulated sugar and finely crushed candy canes for an extra peppermint kick and sparkle. Scoop the chilled dough using a small cookie scoop (about 1.5 tablespoons) to ensure uniform size. Roll each ball first in plain granulated sugar, then in the peppermint-sugar mixture, ensuring it’s evenly coated. This sugary coating not only adds a lovely crunch and visual appeal but also helps prevent spreading.
The Magic Moment: When to Add the Kiss
Arrange the coated dough balls on the prepared baking sheets, leaving about two inches between them. Bake for approximately 8-10 minutes, or until the edges are set but the centers are still slightly soft. This is crucial: do not overbake! Overbaking will result in dry, hard cookies. The magic happens right out of the oven. As soon as you remove the baking sheet, gently press a Hershey's Kiss into the center of each warm cookie. The residual heat will soften the chocolate, creating that signature, slightly melted "blossom" look. For a deeper dive into timing and technique, check out our article on Holiday Chocolate Peppermint Blossoms: A Festive Twist.
Allow the cookies to cool on the baking sheet for a few minutes before transferring them to a wire rack to cool completely. As they cool, the chocolate Kisses will re-solidify, holding their soft shape. Patience here is key; moving them too soon can cause the soft cookies or kisses to break apart.
Elevating Your Chocolate Peppermint Blossoms: Tips, Twists, and Troubleshooting
While the classic chocolate peppermint blossom is perfect as is, there's always room for personalization and refinement. Knowing how to troubleshoot common issues can also save your batch!
Creative Variations and Garnishings
- Different Kisses: Experiment with different Hershey's Kiss flavors like Hugs (white chocolate), dark chocolate, or even caramel Kisses for an interesting flavor combination.
- White Chocolate Drizzle: Once the cookies are completely cool, melt some white chocolate and drizzle it over the cookies for an elegant touch.
- Extra Peppermint Dust: Lightly dust the cooled cookies with a mixture of powdered sugar and finely crushed candy canes for a snowy, vibrant finish.
- Mini Chocolate Chips: Fold in a handful of mini chocolate chips into the dough for an extra chocolatey texture.
- Extract Variations: While peppermint is traditional, a touch of almond or orange extract could offer a unique twist to the chocolate base (use sparingly!).
Common Pitfalls and How to Avoid Them
- Cookies Spreading Too Much:
- Ensure your butter isn't too warm.
- Chill the dough adequately (at least 30 minutes).
- Measure flour accurately; too little can lead to excessive spreading.
- Don't grease your baking sheets if using parchment paper; the slight resistance helps prevent spreading.
- Kisses Melting Completely:
- Make sure your cookies are just out of the oven. If they cool too much, the Kisses won't melt properly. If they are too hot (oven too high, cookies overbaked), the Kisses can melt completely into a puddle.
- Use Kisses that have been chilled in the freezer for 10-15 minutes prior to baking; this helps them hold their shape better.
- Dry or Crumbly Cookies:
- Avoid overmixing the dough.
- Do not overbake. Remove them when the edges are set, and the centers are still slightly soft.
- Ensure you're using fresh ingredients, especially baking soda.
- Lack of Peppermint Flavor:
- Use a high-quality peppermint extract.
- Don't be afraid to adjust the amount of extract slightly to your taste (but start small!).
- Use peppermint Kisses and/or roll in crushed candy canes for a more intense flavor.
Storing and Gifting Your Festive Chocolate Peppermint Blossoms
Once you've baked your beautiful batch of chocolate peppermint blossoms, proper storage and presentation are key to enjoying them and sharing the joy.
Keeping Them Fresh
Store your cooled chocolate peppermint blossoms in an airtight container at room temperature for up to 5-7 days. To maintain their freshness, you can place a slice of bread in the container; it helps keep the cookies soft by transferring its moisture. For longer storage, chocolate peppermint blossoms freeze beautifully. Arrange them in a single layer on a baking sheet to freeze solid, then transfer them to a freezer-safe bag or container for up to 2-3 months. Thaw at room temperature before serving.
Thoughtful Presentation for Holiday Treats
These cookies are naturally festive, making them ideal for gifting. Arrange them in decorative tins, clear cellophane bags tied with festive ribbons, or on a beautiful holiday platter. Layering them with parchment paper can prevent them from sticking together. Consider adding a small tag with the cookie name and ingredients, especially if gifting to those with dietary considerations. Your homemade chocolate peppermint blossoms will undoubtedly be a cherished gift, spreading holiday cheer with every bite.
The journey of making chocolate peppermint blossoms is one filled with delicious rewards. From the initial mixing of the dough to the delightful aroma filling your kitchen and the final bite of a perfectly balanced chocolate and peppermint treat, every step is a celebration of holiday spirit. By following these top tips, you're not just baking cookies; you're crafting memories and traditions that will be savored and remembered. So, gather your ingredients, put on your apron, and get ready to create the most enchanting chocolate peppermint blossoms your holiday season has ever seen!
